FAQs
Out of Stock Items & Estimated Ship Dates
What does it mean when a product shows "Est. Ship Date..."?
When a product is marked with "Est. Ship Date...", that means it's out of stock and we're letting you know the estimated date when it will be back in stock. (This estimated date can change.) You can still purchase the item now and when the item becomes available, it will ship to your provided shipping address.
Product Availability
Product inventory is updated daily, Monday thru Friday, by 8am.
Helmet/Accessory Compatibility
Unsure which shield or comfort liner is compatible with your helmet? Check out our compatibility chart here: Helmet/Accessory Compatibility Chart
Helmet Care:
Exterior: We suggest using a mild soap and water to clean the exterior of the shell and wipe dry with a clean cloth. Allow helmet to full dry prior to storage. Or use Molecule's Cleaner Polish for Helmets with a Gloss finish, and Molecule's Matte Detailer for helmets with a Matte finish.
Interior: We suggest removing the liner from the shell of the helmet and washing seperately using a mild soap and water. Allow to dry fully prior to reinstalling into your helmet.
Storage: Proper storage is important to avoid damage to your helmet. Avoid contact with extreme heat or cold. Do not use any solvents or chemicals to clean your helmet. Allow to full dry prior to storage.
Race Suit & Gloves Care:
Spot clean or machine wash with mild soap and water. If machine washing, use a gentle or delicate cycle, cold water, and turn the suit/jacket/pant inside out prior to washing. Avoid using harsh cleaning detergents, bleach, and fabric softeners. Allow the suit or gloves to dry, indoors, out of direct sunlight. Make sure suit or gloves are thoroughly dry before storing or racing.
Race Shoes:
Spot clean using mild soap and water, avoiding harsh detergents and bleach. Allow to air dry, indoors, out of direct sunlight. Make sure shoes are thoroughly dry before storing or racing.
Installing the 3.5mm Plug & Speakers into Ear Cups:
Fabric Chin Curtain/Breath Deflector:
Helmet Hydration Kit Installation:
For Front Hydration:
For Switch Hydration:
One-Way Radio Cap Installation:
Step 2 - Remove the Cheek Pad on preferred side of helmet by sliding towards bottom of helmet (note: cheek pads fit snugly in helmet)
Step 3 - Unless previously installed - install Ear Cups with Speakers by pulling fabric back from cheek pad and changing previous ear cup or ear pad to new Ear Cup with Speaker, then replace fabric.
Step 4 - Remove the Comm or Aero Cap from preferred side of helmet by unscrewing the three screws on the shell of the helmet, found under the cheek pad
Step 5 - Pull the 3.5mm plug through triangular vent in helmet, then through the largest hole in One-Way Radio Cap
Step 6 - Install the One-Way Radio Cap onto the preferred side with the three screws from prevous cap.
Step 7 - Re-install the cheek pad (or cheek pads) by gently sliding into the helmet from bottom, pulling the chin strap through the slot in the cheek pad (note: cheek pads fit snugly and you may need to reinstall the EPS chin foam as well, this foam locks in between the cheek pads)
Step 8 - Make sure to tuck any extra wiring behind the cheek pads and between EPS foam and crownliner of the helmet.
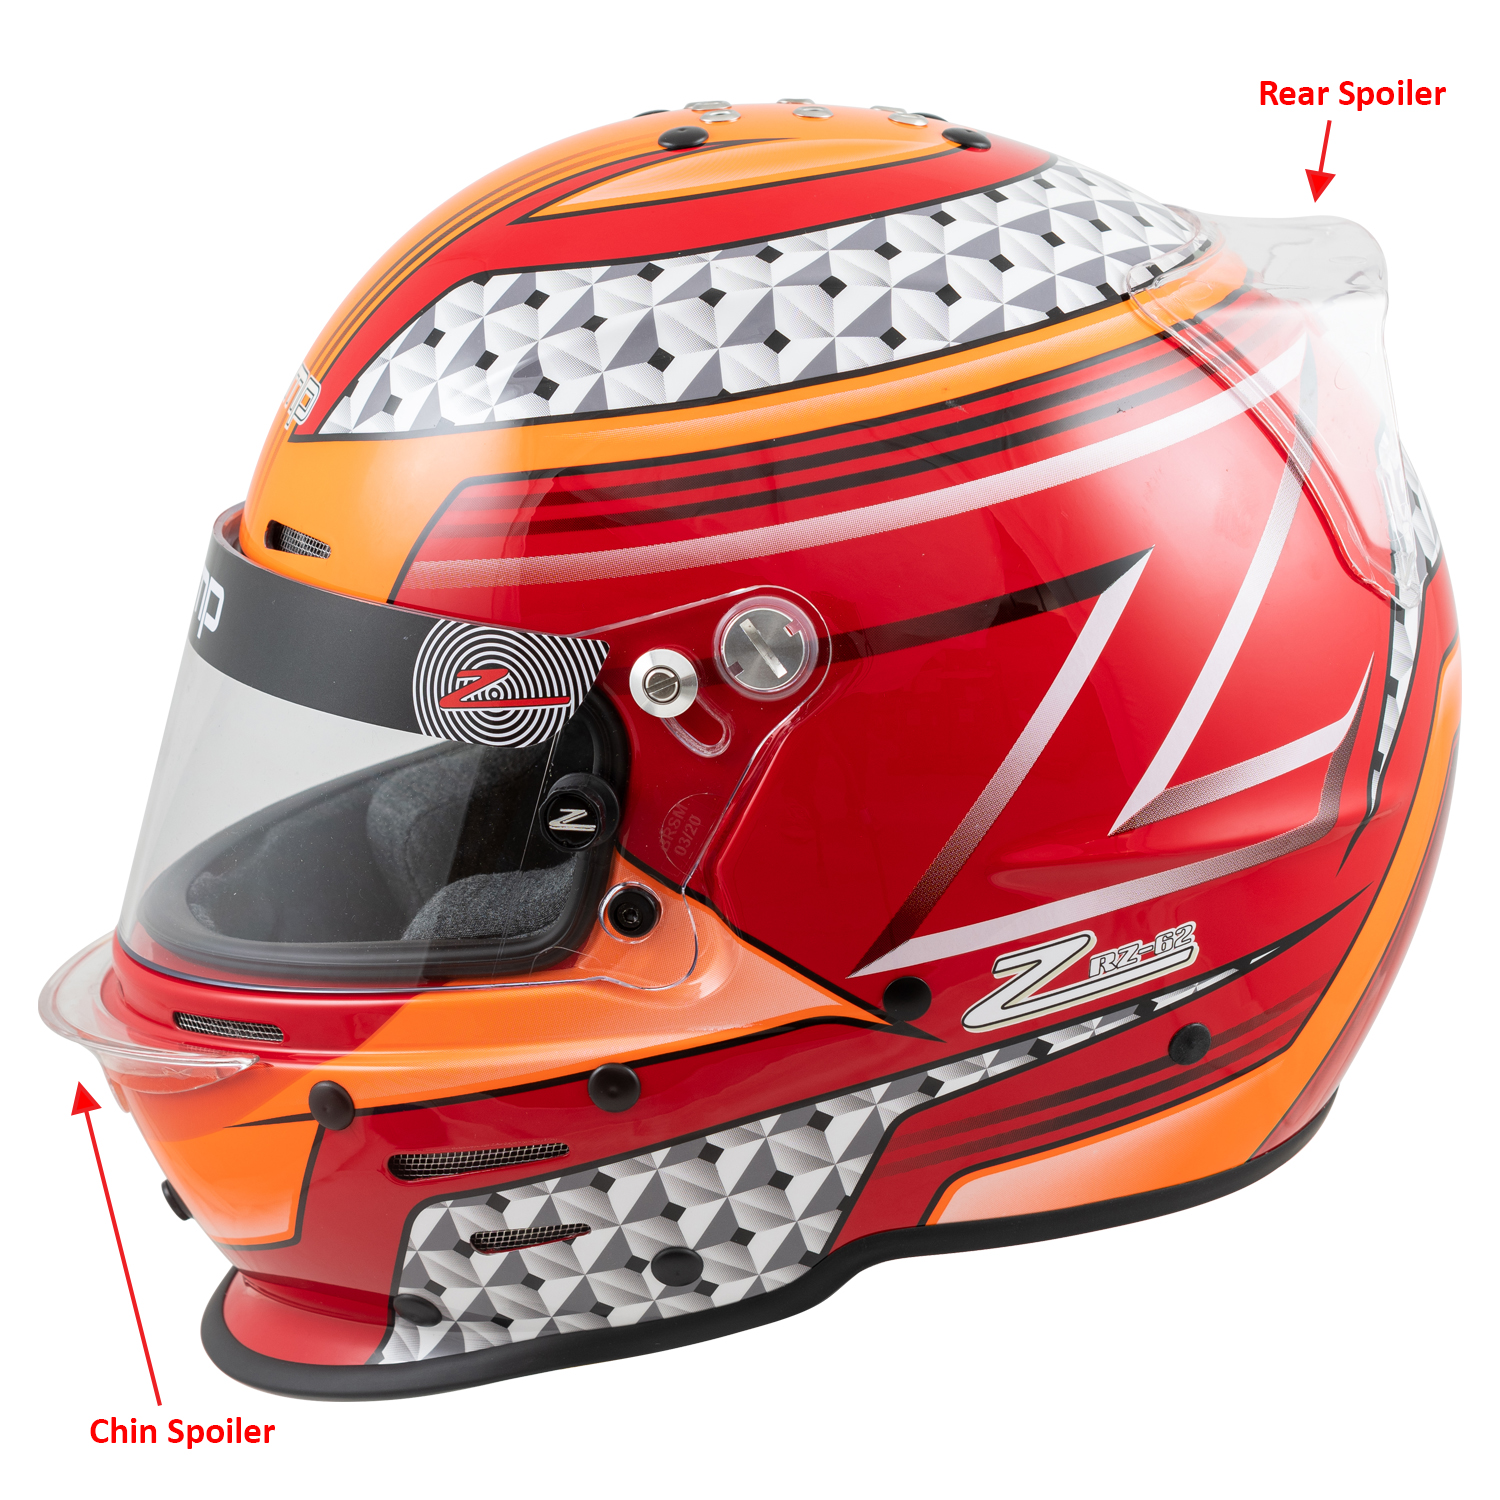
Spoiler Installation:
Front Chin Bar Spoiler:
Step 1 - Temporary Marker to mark position of Front Spoiler Center on Chin BarStep 2 - Clean surface of the helmet
Step 3 - Remove red protective film from adhesive on spoiler
Step 4 - Lightly set Spoiler on front of helmet. Once positioned correctly, apply firm pressure to attach spoiler.
Rear Spoiler:
Step 1 - Temporary Marker to locate centerline of spoiler and helmet.Step 2 - Put the helmet on as you would wear it while racing. It is important to mount the spoiler so it sits 1" below Top Center when wearing.
Step 3 - Mark position of rear spoiler, located 1" below Top Center (have someone help with this step)
Step 4 - Clean the helmet. We suggest using a mild soap and water (Important: don't use anything that has wax as this will reduce adhesion)
Step 5 - Remove red protective film from adhesive on spoiler.
Step 6 - Lightly set spoiler on rear of helmet. Once positioned correctly, apply firm pressure to attach spoiler. It is important to apply pressure first in the center and work to the sides.
Z-20/Z-24 Shield Replacement:
NOTE: DO NOT USE power tools or overtighten screws when changing shields.
Step 1 - Lay a towel on a flat surface and set the helmet on it.
Step 2 - Remove the shield pivot tensioners on each side. (This is the smaller screw on the sides of the shield.)
Step 3 - Remove the shield pivot screws on each side. (This is the larger screw on the sides of the shield. For best results, we suggest using a quarter to loosen/tighten these screws.)
Step 4 - Remove the shield. We suggest using a soft cloth towel to wipe down the rubber seal as well as where the shield mounts to the helmet for best results.
Step 5 - Place the new shield on the helmet. There are two white washers that go between the shield and helmet, make sure these are in place before re-installing the shield pivot screws.
Step 6 - Hand thread the shield pivot screws to hold the shield in place. Once hand threaded, use a quarter to tighten until snug with the helmet shell. Do not overtighten.
Step 7 - Hand thread the shield pivot tensioners, then tighten to desired tension for shield movement.
Z-19 Shield Replacement (for FS-9 Helmets):
Replacing the shield is very quick and simple, here's how we suggest changing shields.
Step 2 - Grabbing the shell of the helmet through the eye port, put your thumb on the back sliding shield lock. (This is the round black piece surring the black phillips head screw.)
Step 3 - Slide the shield lock towards the back of the helmet. While holding the lock back, gently release the shield. You will hear a gentle snap, this is normal, and the shield will be released from the helmet.
Step 4 - Repeat this process of the other side
Step 5 - To install the new shield, just reverse the process. Slide the shield sliding lock towards the back of the helmet and gently push the shield tabs into the correct place. Do this on both sides.
Step 6 - Important! - Ensure the sliding shield locks are slid fully towards the front of the helmet. This locks the shield on and prevents unwanted release from the hinges.
Z-22 Shield Replacement (for FR-4 Helmets):
Z-23 Shield Replacement (for FL-4 Helmets):
Z-15 Shield Replacement:
NOTE: DO NOT USE power tools or overtighten screws when changing shields.
Step 1 - Lay a towel on a flat surface and set the helmet on the towel.
Step 2 - Remove the shield pivot and tensioner off the left-hand side. This is the side that has the plastic shield lock.
Step 3 - Remove the shield pivot on the right-hand side of the helmet.
Step 4 - Remove the shield. We suggest using a soft cloth towel to wipe down the rubber seal as well as where the shield mounts to the helmet for best results.
Step 5 - Place the shield on the helmet. Hand thread the right-hand shield pivot.
Step 6 - Install the shield pivot and tensioner on the left-hand side. Tighten until it is snug with the helmet shell. Do not overtighten.
Step 7 - Tighten the shield pivot on right side of helmet.